How to Use USB-Controller App

Smartphone to Parallel Port
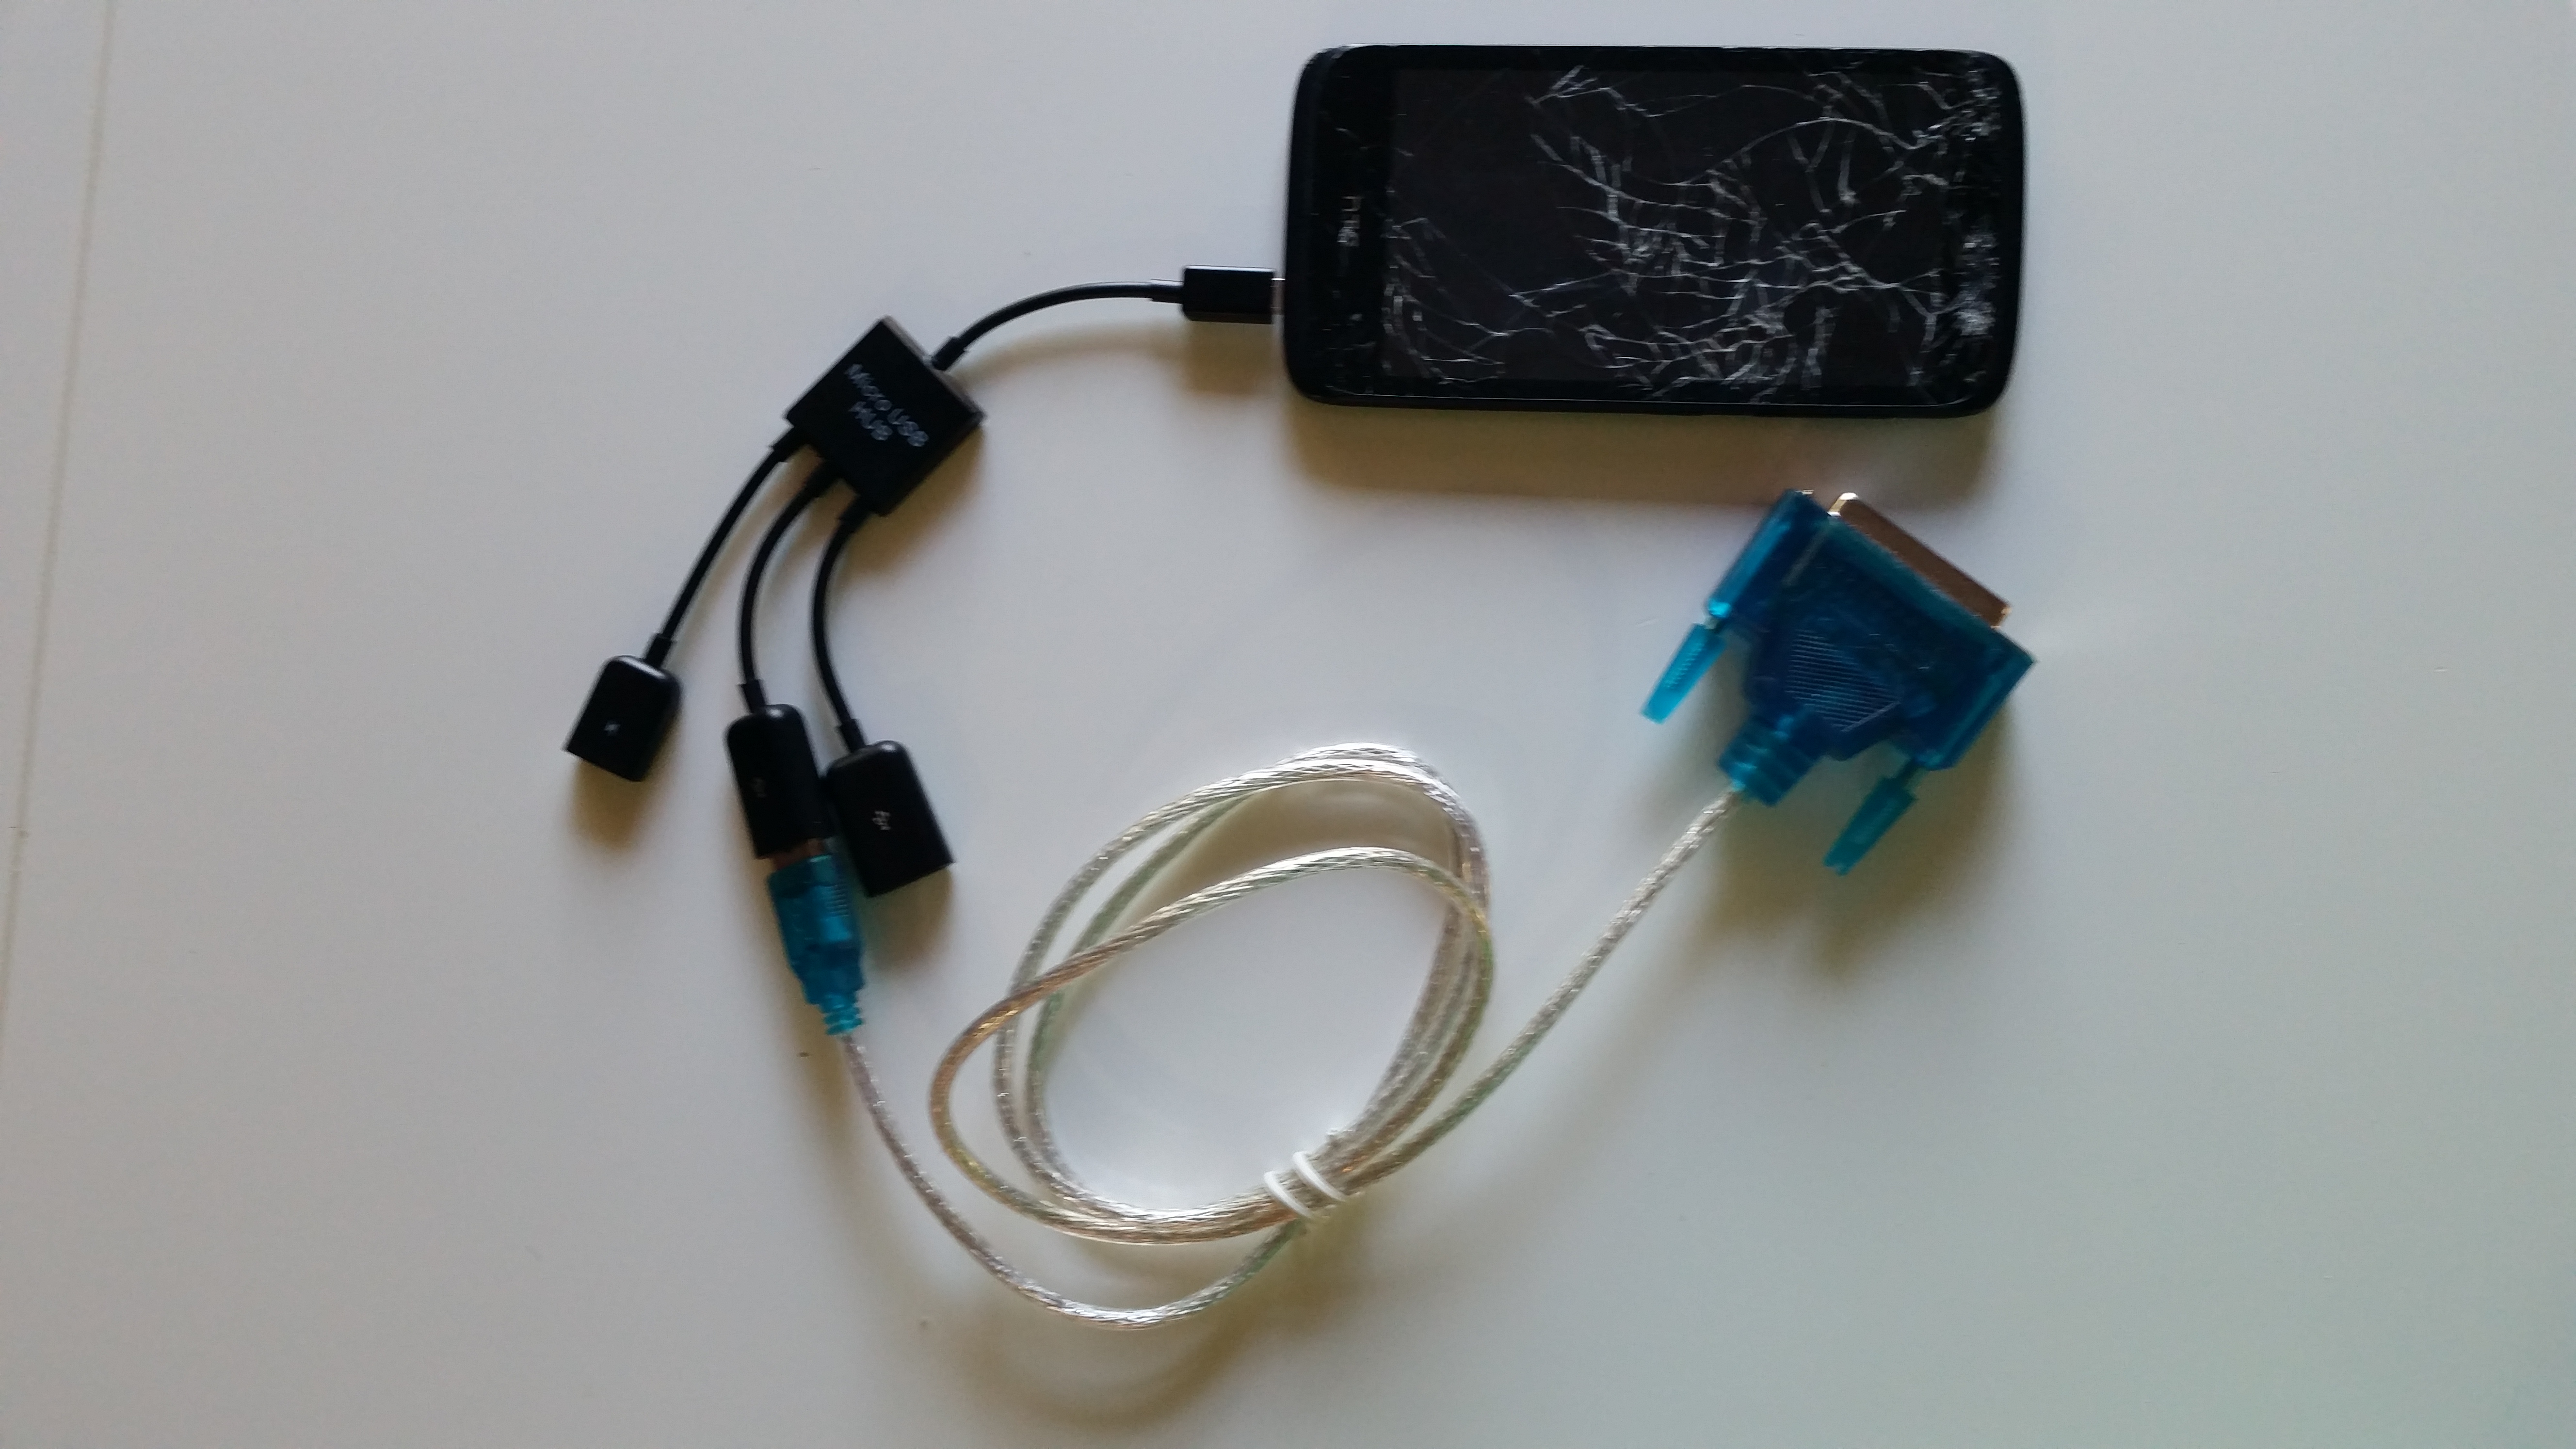
Smartphone connected through a USB-OTG hub to a USB to Parallel port cable
Android Smartphone USB Controller of Parallel Port to Motor Circuit
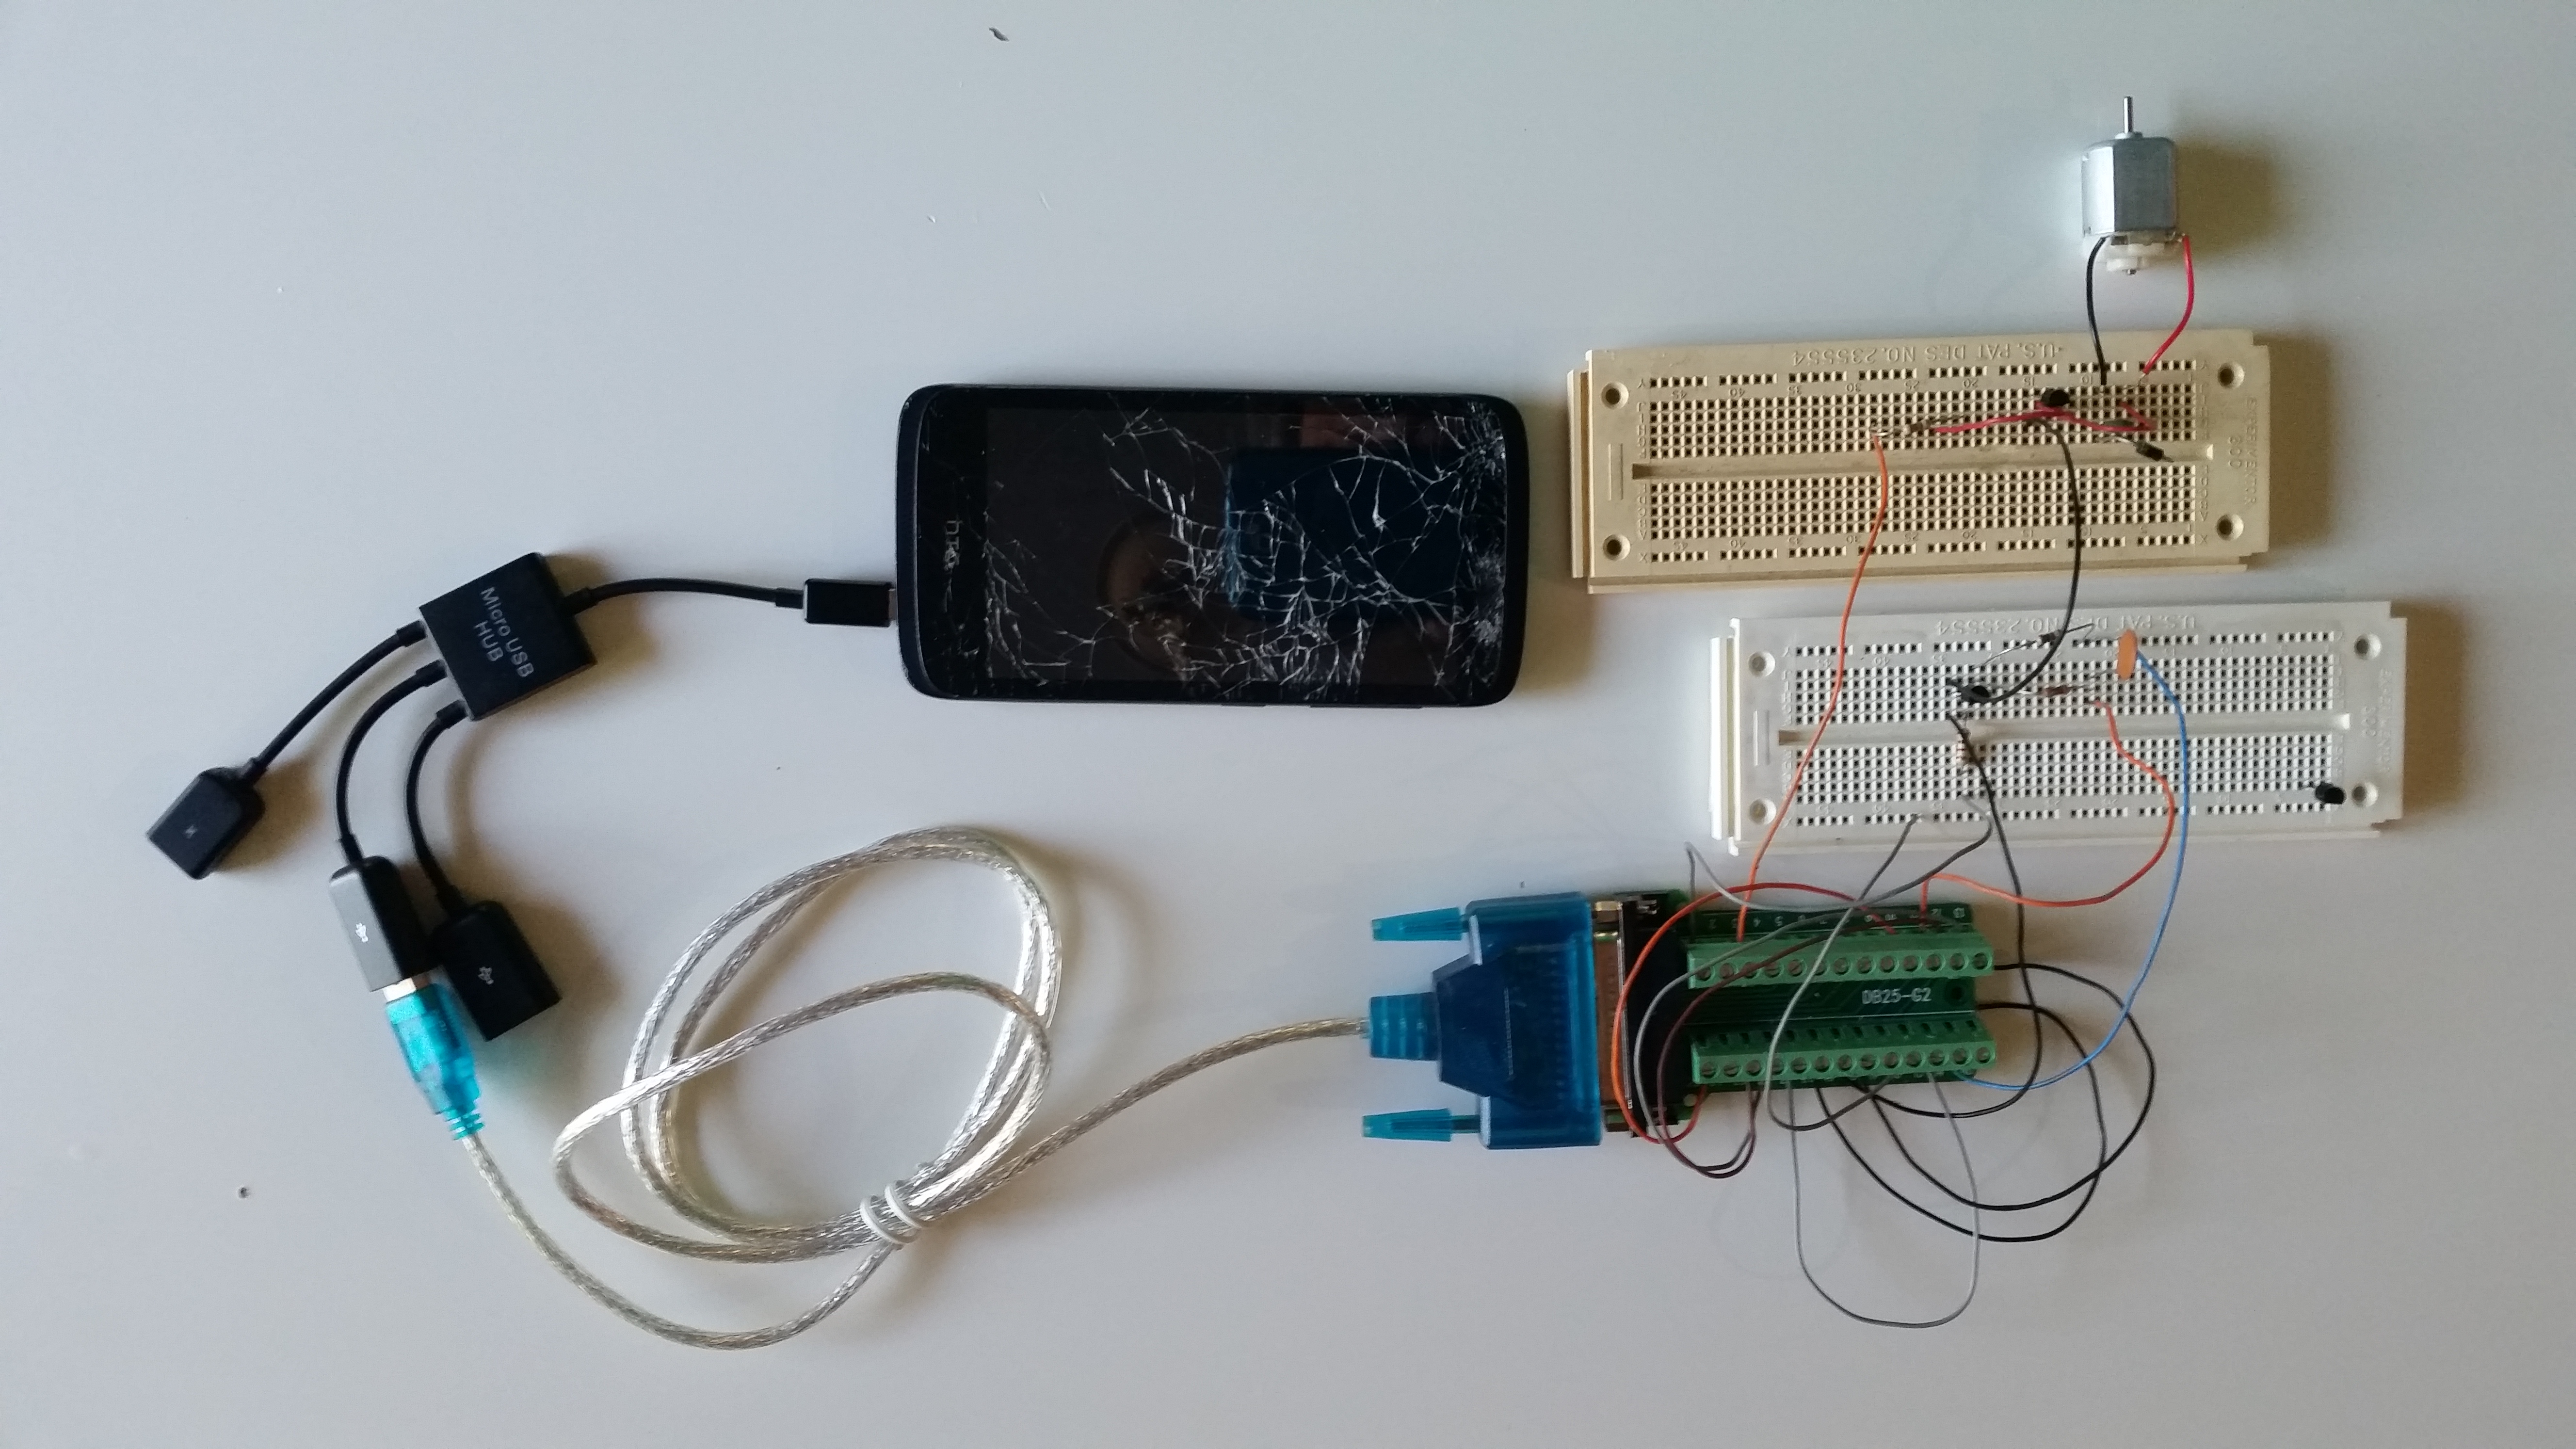
Smartphone controlling an electric motor

If you want to build your own controller device, you could leverage an Android device and the USB-Contrller app. For some background and how to build a phone usb controller, see Phone USB Controller.

To use USB-Controller, start by downloading the Android app to your Android smartphone that you think has USB-OTG support.

Link to USB-Controller for Android smartphones

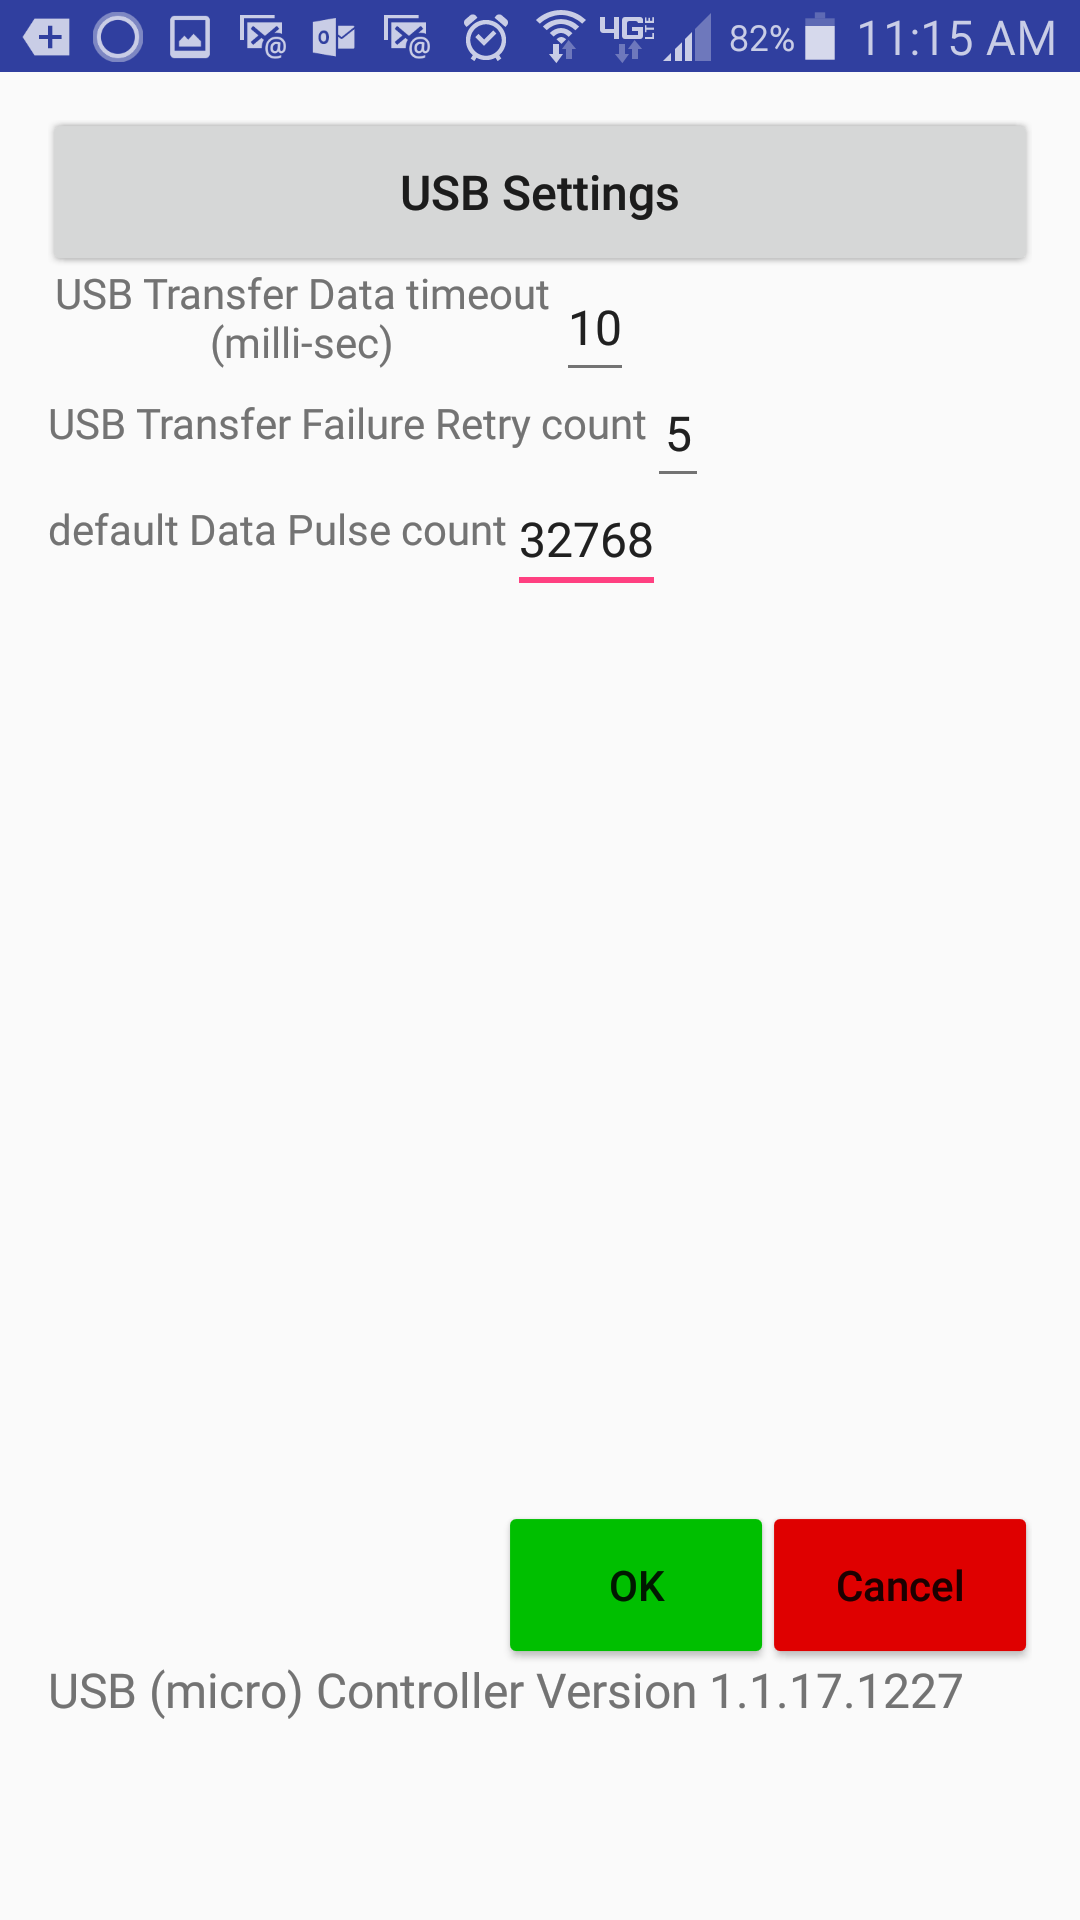
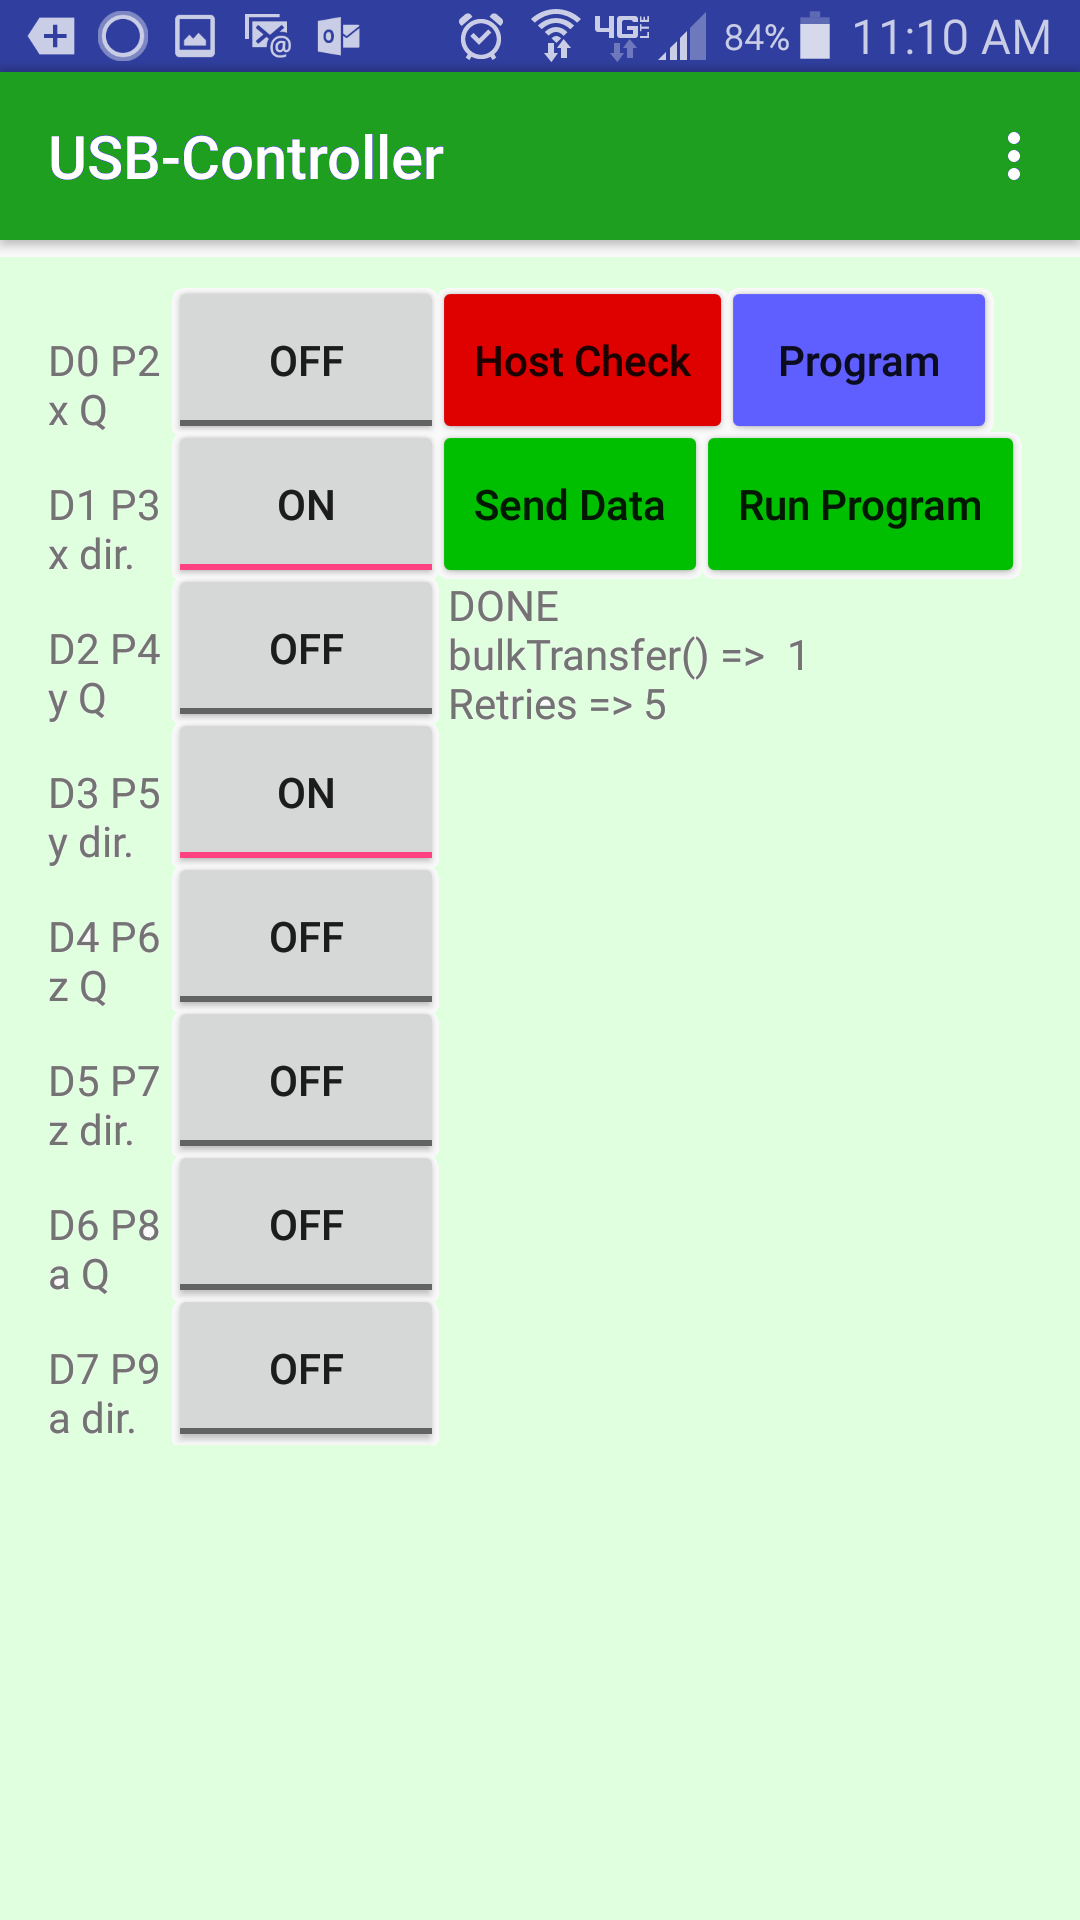
The first thing you will want to do with USB-Controller is verify that your smartphone hardware supports USB-OTG or USB host mode. Determining if smartphone hardware supports USB-OTG or USB host is a little hard because you have to have a USB device attached to the Android device in order for the software to determine if USB-OTG is supported. However, if you have a USB-OTG adapter or hub plugged into your smartphone and any working USB device plugged into that, you can use USB-Controller to check if your smartphone recognizes the USB device. To check your hardware, select the USB Host check button.


USB-Controller USB-Controller

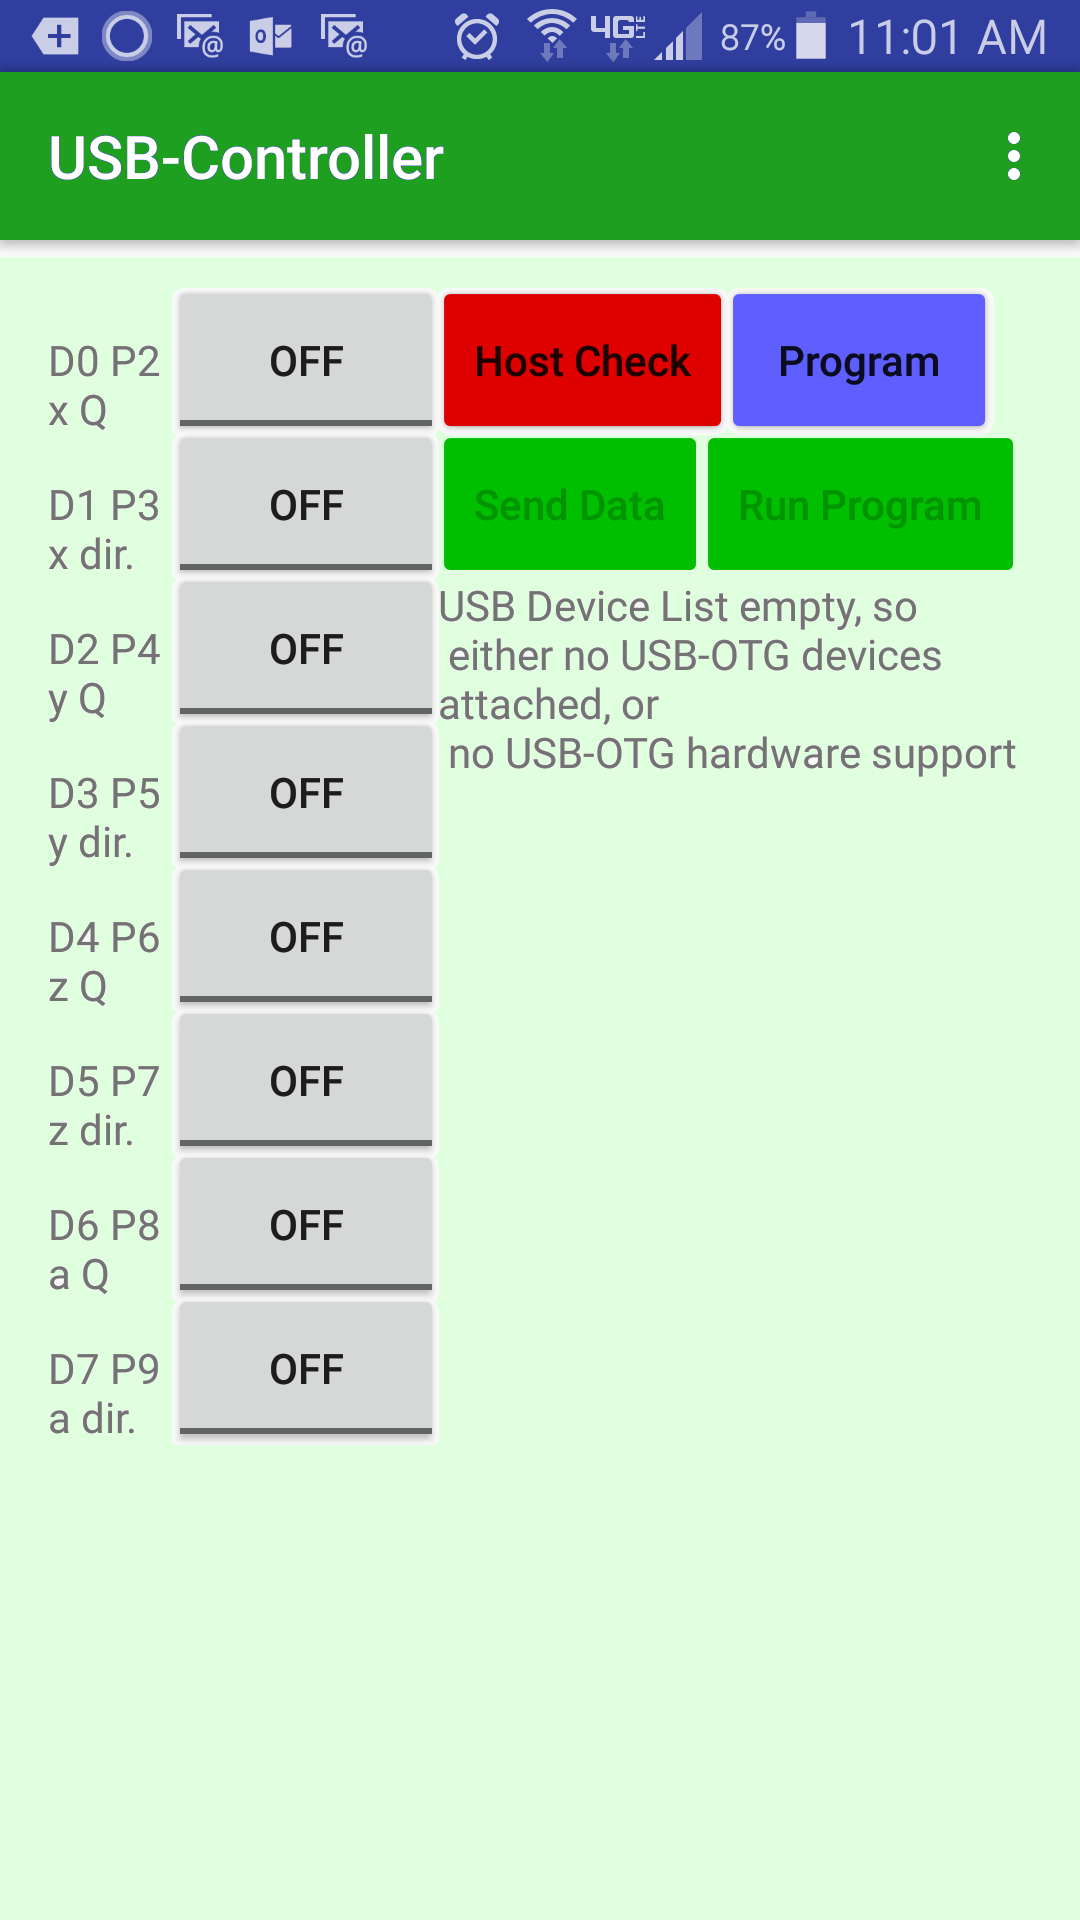
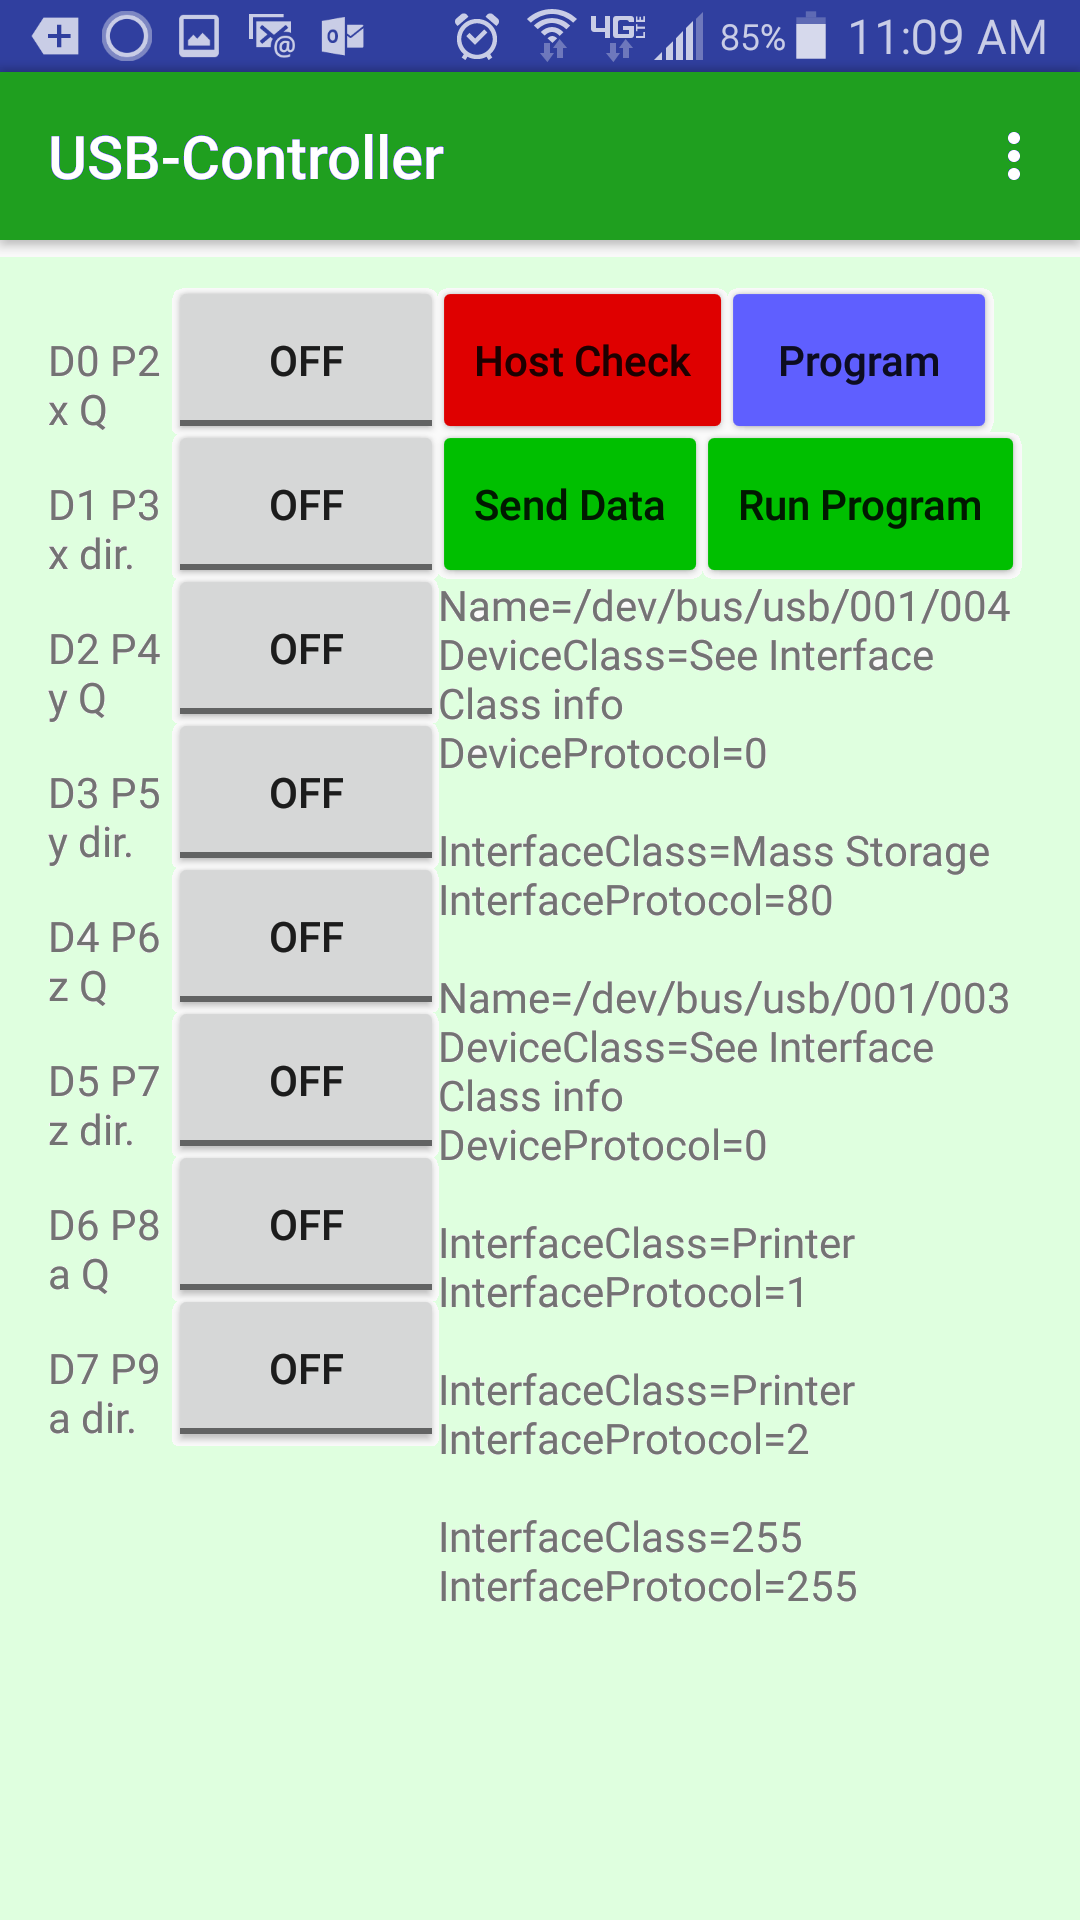
This will tell you what USB devices were identified as being connected to your Android device, or it won't recognize any devices. If USB-Controller indicates 'USB Device List emptry' like the upper images above, then you don't have a USB device attached or your Android device doesn't support USB-OTG (aka USB-Host). If USB-Controller indicates a list of Names and Devices and/or Interfaces, then you have at least one USB device attached and your Android device does support USB-OTG. Finally, if the 'Send Data' and 'Run Program' buttons are enabled like the lower images above, then you have a USB parallel printer adapter attached that your Android device has recognized.

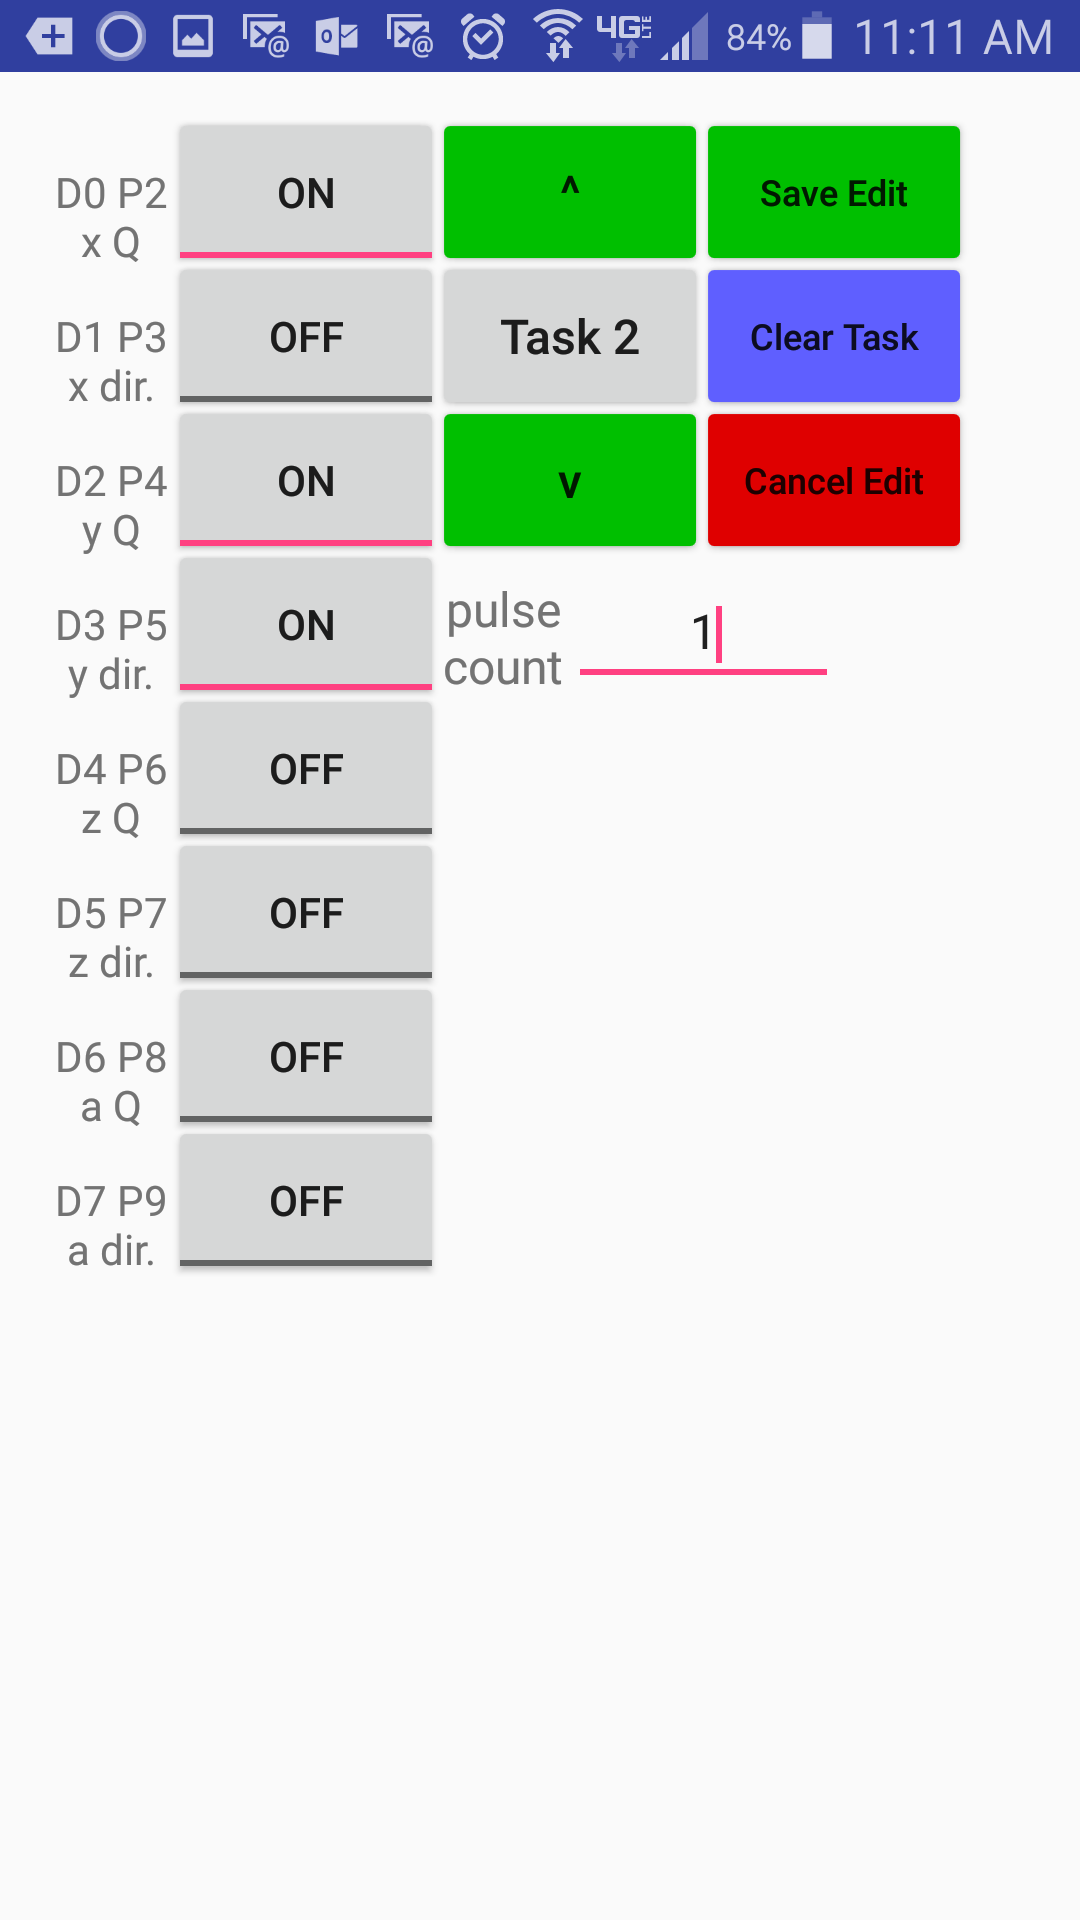
Assuming your smartphone supports USB-OTG you have three ways that you can use USB-Controller: immediate, data program, or Z80 program.

How To:

1) use USB-Controller in immediate mode

USB-Controller USB-Controller


Every time a byte is written to the data ports, the data is only present as long as the Busy line is high. However, the Strobe to Busy circuit described on Phone USB Controller regularly lowers the Busy line so that you can continue to send control bytes. Thus you need to continuously send control bytes to the port in order to be able to change the state in the future. To configure how many times in a row USB-Controller will resend the data, go to the Settings menu item, under the button in the upper right corner, and set the Pulse Count. You can also set the data transfer timeout time and then number of times to retry if the USB hardware detects a failure from the Settings screen.

Once set, go back to the main USB-Controller view and set the bits you want to turn on and the select the Send Data button. The data will be held as long as a pulse count counter is running.

2) use USB-Controller in data program mode

USB-Controller USB-Controller


While functionally similar to the immediate mode, data program mode allows for you to set multiple data states and pulse counts at one time and then run through the sequence of tasks you entered. You can set up to 64 tasks in data program mode.

To create a data program of tasks go to the Program menu item, under the button in the upper right corner, or just select the Program button. The task # is shown with the option of moving to the previous or next task by selecting one of the arrow buttons. Set the bits you want to turn on or off and the pulse count you would like the task state to be held for. You can then use the previous or next arrow buttons to program the next task. When you're done entering the program, select Done Edit to go back to the main USB-Controller view.

From the main USB-Controller view, select Run Program to execute the task sequence. The data will be held as long as a pulse count counter is running for each task. Once the pulse count counter is done, the program moves on to the next task.

3) use USB-Controller (Pro) in Z80 program mode


You can also run a data program with the Z80 microcontroller because when you create a data program, a small Z80 program is added that can interpret the data. While you can run a data program with the Z80 microcontroller, you can also run other Z80 programs with the Z80 microcontroller by loading *.hex files that contain 8080, 8085, or Z80 code. Note that you can only do this with USB-Controller (Pro) since file operations are not allowed in the free version of USB-Controller.

While a data program only allows you to program and run a task sequence, a Z80 program could allow you to do loops and conditionally change what output is done. To create a Z80 program to run in USB-Controller (Pro) you will develop the program on another device such as a Window or Linux PC or laptop. For an example of one approach to doing this see our documentation on teraKUHN IO System (KIOS). Once you've opened the Z80 program stored in a *.hex file, you should be at the main USB-Controller view.

From the main USB-Controller view, select Run from the app menu to execute the Z80 program. If the program is designed to run forever, you can stop it by selecting Stop from the menu.

Link to USB-Controller for Android smartphones


teraKUHN solutions
Hardware Setup Control System Hardware Abstraction Development Tools
Smartphone Controller
(with PWM or advanced latch circuit)
USB-Controller teraKUHN IO System (KIOS) Debug Z80 KCC80 KPC80
Smartphone Controller
(with advanced latch circuit)
AVR-Controller C & C++ coding abstraction macros Debug AVR Arduino C++
Arduino Controller
.
N/A C & C++ coding abstraction macros Debug AVR Arduino C++


Here are some architecture characteristics that can be demonstrated by these two control solutions. These differences can be used for teaching processor and microcontroller concepts.

control solutions
Z80 custom with KIOS AVR Arduino
CISC RISC
von Neumann architecture Harvard architectures
Run-time software abstraction layer Compile time coding abstraction macros
custom electonics board pre built Arduino board


Copyright (C) 2017 - 2022 R. J. Kuhn. Please note that you are not allowed to reproduce or rehost this page without written permission.

Flag Counter